 PUGHx2
Translated and adapted from http://wiki.modx-shopkeeper.ru/doku.php?id=simple_integration and http://blog.sklazer.com/652.html
Quick Start - An Introduction to Shopkeeper3 using a Simple Example
Part 2 - Pulling it all together and adding the <Add to Cart> button.
Remember the product listing we created in "Starting with Collections, a Simple Example", now all we need to do is provide the ability to add the item to the shopping cart.
So, let's create a Resource named shop where we can sell our goods. This should look something like:
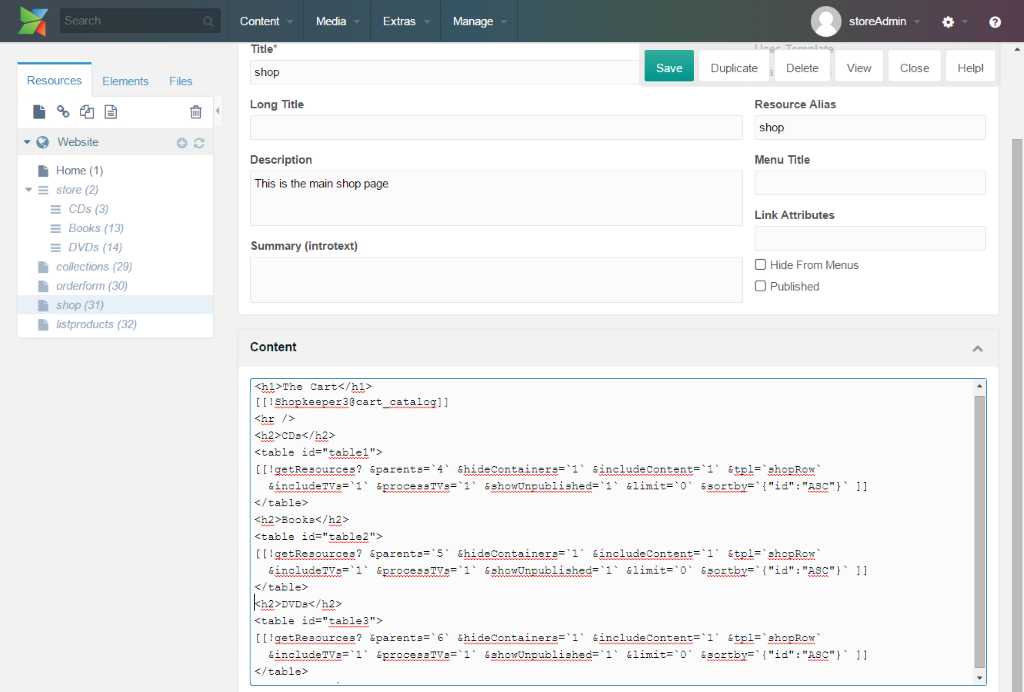
As you can see, this is an amalgam of the orderpage we created above, and the listproducts page that we created in the the article "Starting with Collections, a Simple Example", except that the output chunk has been changed from prodRow to shopRow. If fact shopRow is an exact copy of prodRow, but don't fret we will be changing it later.
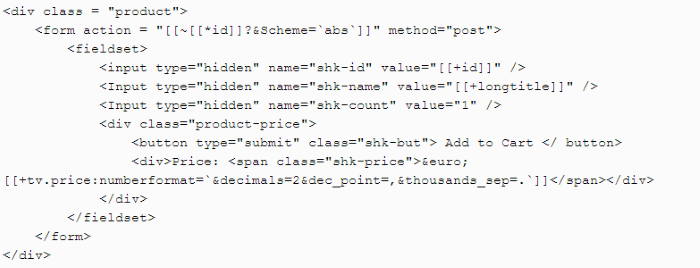
Now we need to add an "Add to Cart" button to each item in our catalog. To do this, create a chunk called addToCart, which should look something like this :-
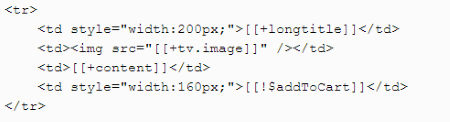
... and apply this chunk to each item in the product list by changing chunk shopRow to read :-
You can now test your page, you should be able to add and remove items from the cart, change quantities and empty the cart.
Note: that longtitle is being displayed instead of the default pagetitle due to the extra parameter fieldName that we added to the Shopkeeper3 snippet in Part 1.
...REMEMBER TO PUBLISH ALL YOUR RESOURCES, OR YOU WILL WONDER WHY IT IS NOT WORKING...
See the shop page here.
