 PUGHx2
PiCorePlayer + Waveshare 3.5" TFT screen + Jivelite.
A disclaimer, this is not all my own work, so many thanks to all those who contributed their time and knowledge for the benefit of us all.
This page briefly explains how an equivalent to the late lamented Squeezebox Touch can be build for relative peanuts.
What you will need :
 |
A suitable Raspberry Pi | £34 / €40 |
 |
at least 2GB SD card | £4 / €5 |
 |
5 volt 3 Amp power supply | £7 / €8 |
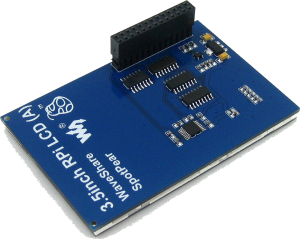 |
A TFT screen - I used a Waveshare Spotpear 3.5" | £20 / €25 |
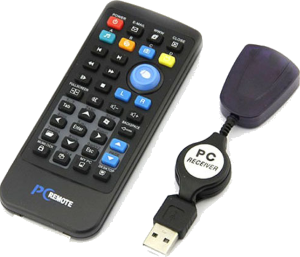 |
Optional - Generic remote | £6 / €7 |
| TOTAL | approx £70 / €80 |
This process has been tested using piCorePlayer 6, 7 and 8 with a Waveshare SpotPear 3.5 inch TFT screen (480 x 320) and Jivelite on an Rpi 2B+, 3A+, 3B+ and on an Rpi Zero W.
Getting Started
I am a windows user, specifically Windows 11, and this guide has been written from that standpoint. I am sure that other OS users will be able to extrapolate to suit your own preferred environment - but please don't ask me about things not in this guide.
What you need on Windows.
- WinSCP - a free SFTP, SCP and FTP client for Windows,
- Putty - a free implementation of SSH and Telnet for Windows with an xterm terminal emulator,
- Advanced IP Scanner - a reliable and free network scanner to analyse LAN,
- a spare wired ethernet connection to your LAN ( where appropriate! ).
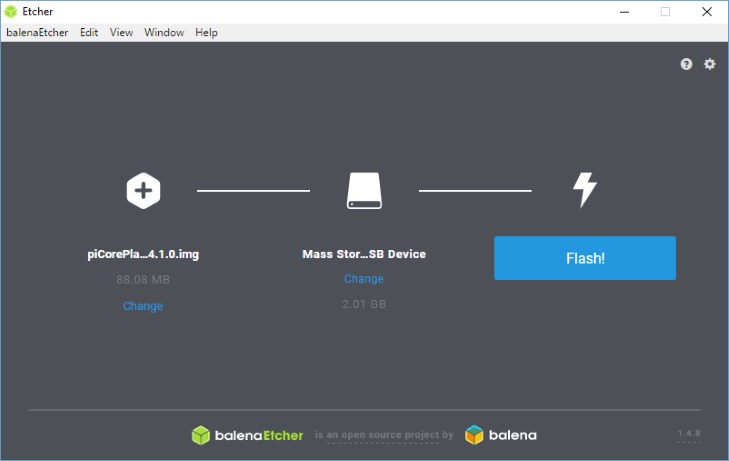
- Balena Etcher - a tool for writing images to USB sticks or SD/CF cards, available for Windows, Mac and Linux.
- NotePad++ (or similar) - Notepad++ is a free (as in "free speech" and also as in "free beer") source code editor and Notepad replacement that supports several languages. I have also set this up to be the default editor in WinSCP.
Source files you need to download.
piCorePlayer - http://www.picoreplayer.org/main_downloads.shtml
Set-up piCorePlayer (Windows)
Using Balena Etcher write the piCorePlayer image that you downloaded previously to your SD card.
With your SD card still in the windows machine,
Use Notepad++ to append fbcon=map:10 fbcon=font:ProFont6x11 logo.nologo to the end of the first (and only) line in cmdline.txt.

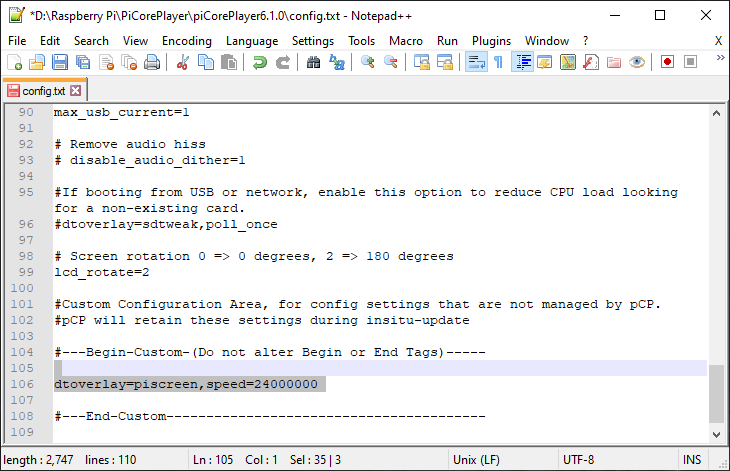
Now change config.txt with the following :
#Custom Configuration Area, for config settings that are not managed by pCP. #pCP will retain these settings during insitu-update #---Begin-Custom-(Do not alter Begin or End Tags)----- dtoverlay=piscreen,speed=24000000 #---End-Custom-----------------------------------------
it should now look like this
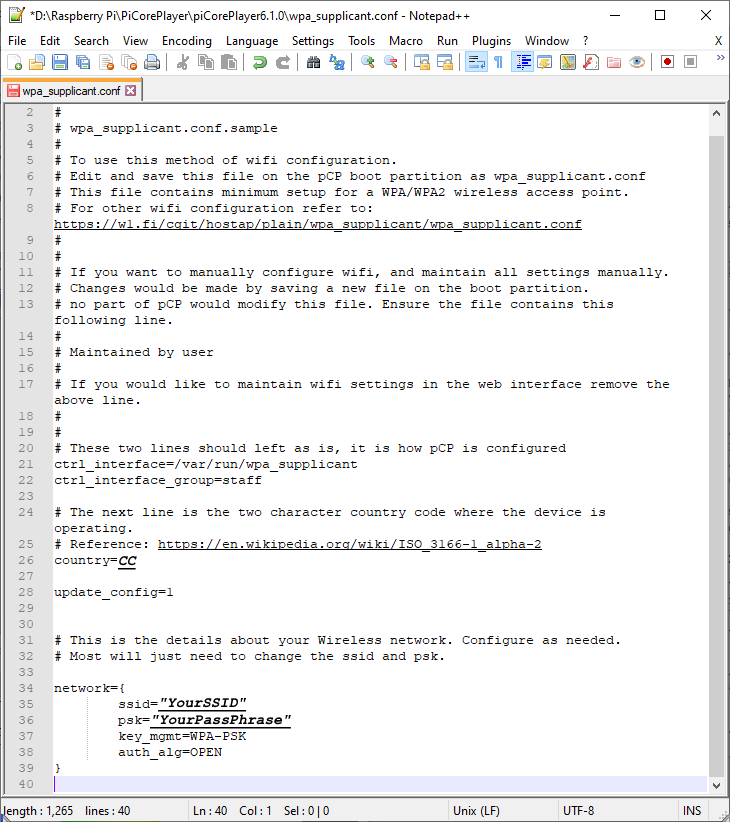
If you are using a wireless Pi, now is the time to create wpa_supplicant.conf. Use Notepad++ to open the wpa_supplicant.conf.sample file and modify the values of country, ssid and psk to values appropriate to your country and WiFi network, and save the file as wpa_supplicant.conf.
It should now look something like this. N.B. Ensure that you have entered the appropriate values for cc, Your-SSID and YourPassPhrase.
Eject the SD card from the windows machine,
Set-up piCorePlayer (raspberry Pi)
Place the SD card in the Raspberry Pi [Rpi], connect to Ethernet (if available) and power on,
Run Advanced IP Scanner to identify the IP address used by the Rpi, now loaded with the PiCorePlayer PCP image
Enter this address into your browser to bring up the PCP web interface,
Go to the Main Page and at the bottom select Beta mode,

Still on the Main Page select the Resize FS button and choose to increase the size to at least 300 MB. If you plan on installing LMS later, this should be increased to at least 1000 MB.

Go back to the Main Page and select the Extensions button at the end of the second section.
After the page has checked the internet and repository availability, select the second tab Available from the menu just below the banner,
Ensure that the piCorePlayer main repository is selected,
Select the pcp-jivelite_default-wav35skin.tcz extension from the repository and click on the Load button.

... the default skin, Jivelite, and all its dependancies will then be automatically loaded.
If your touchscreen is connected and, after a reboot, you should now see system messages being displayed.
Now set up Jivelite.
Run WinSCP and log into PCP using the address obtained above with username tc / password piCore),
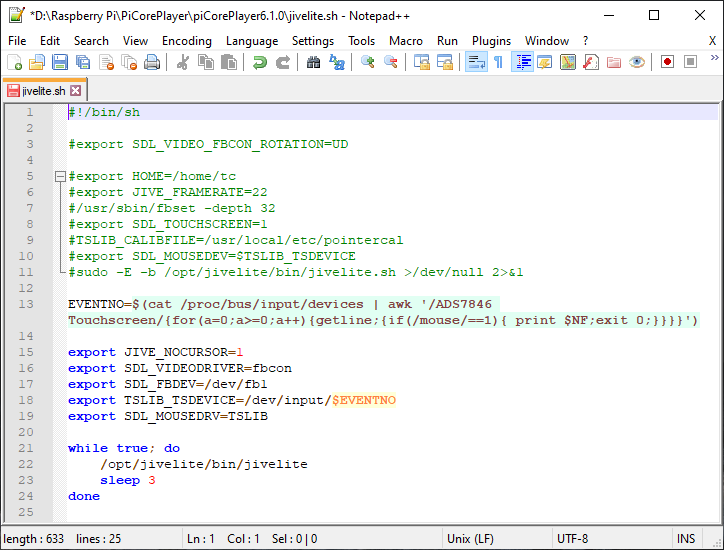
Using winSCP create a file jivelite.sh in /mnt/mmcblk0p2/tce/, MAKE SURE it is executable. Use the built in WinSCP editor and enter the following :
#!/bin/sh #export SDL_VIDEO_FBCON_ROTATION=UD #export HOME=/home/tc #export JIVE_FRAMERATE=22 #/usr/sbin/fbset -depth 32 #export SDL_TOUCHSCREEN=1 #TSLIB_CALIBFILE=/usr/local/etc/pointercal #export SDL_MOUSEDEV=$TSLIB_TSDEVICE #sudo -E -b /opt/jivelite/bin/jivelite.sh >/dev/null 2>&1 EVENTNO=$(cat /proc/bus/input/devices | awk '/ADS7846 Touchscreen/{for(a=0;a>=0;a++){getline;{if(/mouse/==1){ print $NF;exit 0;}}}}') export JIVE_NOCURSOR=1 export SDL_VIDEODRIVER=fbcon export SDL_FBDEV=/dev/fb1 export TSLIB_TSDEVICE=/dev/input/$EVENTNO export SDL_MOUSEDRV=TSLIB while true; do /opt/jivelite/bin/jivelite sleep 3 done
it should now look like this.
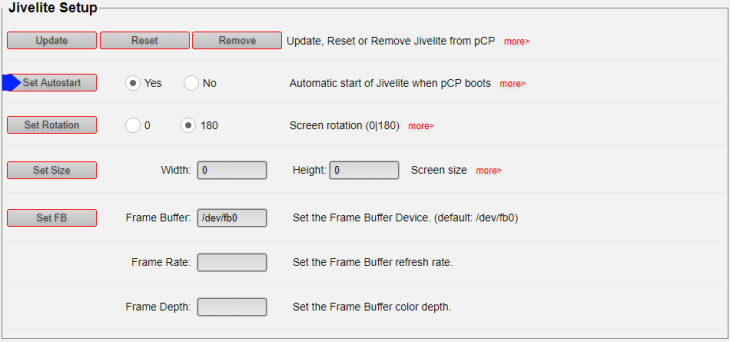
Go to the Tweaks page and in the Jivelite section ensure that Set Autostart is set to Yes. Now reboot as requested.
Following the re-boot, the jivelite application should appear on your Waveshare screen.
Calibrate the Touch Screen
Boot up your PiCorePlayer - PCP,
Run Advanced IP Scanner to identify the IP address used by the PCP,
Enter the PCP IP address into your browser to bring up the PCP web interface,
... at the bottom of the first screen, select Beta mode,
Go to the Tweaks page and set jivelite autostart to no, save the config and reboot. Jivelite must not be running during the calibration,
After the reboot, run Advanced IP Scanner to identify the IP address used by the PCP,
Run Putty and log into PCP using the same address with username tc : password piCore,
Enter cat /proc/bus/input/devices, and note the event number used by your touchscreen,
Enter
$ sudo TSLIB_FBDEVICE=/dev/fb1 TSLIB_TSDEVICE=/dev/input/event0 /usr/local/bin/ts_calibrate
... MAKE SURE that the event number matches that obtained above, then follow the instructions,
Enter
$ sudo TSLIB_FBDEVICE=/dev/fb1 TSLIB_TSDEVICE=/dev/input/event0 /usr/local/bin/ts_test
... to check that the calibration has been successful, [Ctrl+C will terminate the process when you are happy that it is working].
Enter the PCP IP address address into your browser to bring up the PCP web interface,
Go to the Tweaks page and set jivelite autostart to yes, save the config,
Using Putty, enter
$ pcp bu [sudo filetool.sh -b]
... to backup the changes,
using Putty, enter
$ sudo reboot
Following the reboot, with the help of the deity of your choice and a hefty following wind, it should now all be working. If so, congratulations, if not, sorry, start again !
