 PUGHx2
Translated and adapted from http://wiki.modx-shopkeeper.ru/doku.php?id=simple_integration and http://blog.sklazer.com/652.html
Quick Start - An Introduction to Shopkeeper3 using a Simple Example
Part 1 - Installation and Configuration
This article describes how to create a very simple store step by step. This will allow you to get acquainted with the basic principles of Shopkeeper and serve as a starting point for more complex projects.
Warning!
This article is for newcomers to Shopkeeper, but not for beginners in MODX.
The article assumes that you are familiar with the basic concepts of MODX and know what is meant by chunk, snippet, resource template, template variable (TV), placeholder, etc. You should know at least the basics of MODX syntax and not be worried if you see something that looks like [[$ chunk]] or [[! snippet]] in the code. If you are unsure - please first learn the basic concepts of MODX (consult - http://develop.modx.com/develop/revolution/quickstart/ , or http://http://modx.com/learn/). If you lack even this most basic knowledge, it will be hard for you to understand the instructions. If you have no experience in creating websites in MODX, do not start with a project that is as complex as an online store.
The article also assumes that you have at least a basic knowledge of HTML and CSS.
A typical online store includes:
- A product catalog
- Page(s) containing a detailed description of the product(s)
- A shopping basket (and the ability to add and subtract items)
- An order form, allowing payment for selected goods to be made to a specified delivery address, using a payment method, etc.
How to implement this with a Shopkeeper?
On a fresh MODX install, duplicate the Base Template to make a template called 'store' and add two template variables 'price' [Input Options: numeric, 2 decimals, not blank] and 'image' [Input Options: Image].
Create a Product Catalog
A simple product catalog can be (and should be) created using standard MODX functionality even before Shopkeeper is installed. A 'product' is just a standard MODX resource with the addition of suitable Template Variables to describe additional properties such as price, product image, weight, colour, etc. - it all depends on what exactly will be sold in the online store.
In my example I have used the MODX 'Collections' add-on to create and maintain my product catalog. See the article "Starting with Collections, a Simple Example"
Shopkeeper, Installation and Initial Setup
So far, we have worked solely with MODX standard functionality to create and list a simple catalog. Now we must turn our catalog into an online store. Currently the standard tools can not cope with this, so we must turn to Shopkeeper.
This is installed just like any other add-on:
Go to Extras => Installer => Download Extras. Search for, download and install shopkeeper3.
This should have created quite a lot of Chunk and Snippet entries in the Element tree and added a new item under Extras called Order management (SHK3).
Unfortunately for us anglophones, Shopkeeper has been developed largely in Russian - but fear not, the worst of the translation task has been done. Download this package shopkeeper_download_pack here, follow the instructions, and most things will then appear in (almost) correct English !
Now select Extras => Order management (SHK3). Click on the 3 barred icon at the top right and select settings.
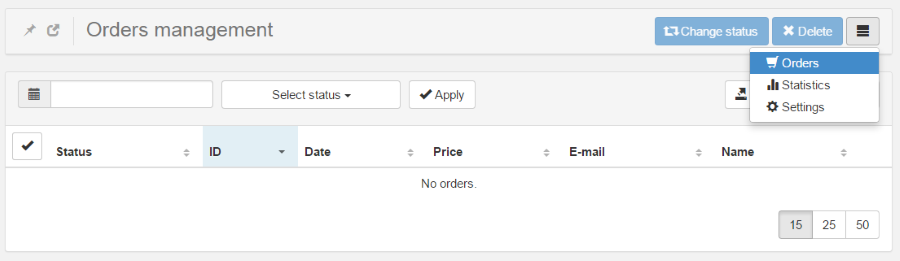
You can now update the Orders settings using values such as those shown below. This is also the place to add Exchange rates, Delivery methods and Payment methods as and when you need them.


I have also added the Payment Method - Cheque.
Initial settings
In the left pane, go to the Elements tab. Open the snippet container Shopkeeper3 find the entry Shopkeeper3. Right click on it and choose Edit.

Click on the tab Propeties. You will see that the default set of properties is locked, so we must go ahead and create our own set which we can modify to our requirements.
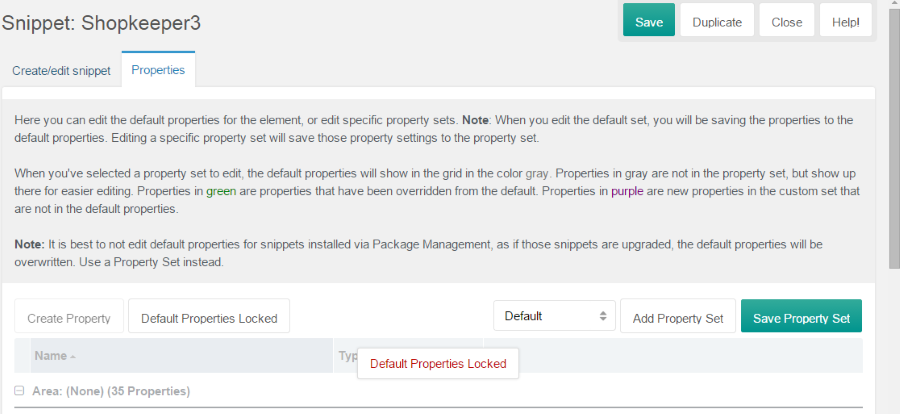
Click on Add Property Set tick Create New Property Set and call the new set cart_catalog. Click Save, and now our new set is displayed in the drop-down list. The new set should be open by default, but if not, open it by selecting from the drop-down list.
There are four parameters that need to be changed, currency (€), lang (en), OrderFormPageId (the ID of the page that will be your Order Form [doh!], in my case 30), and tplPath (core/components/shopkeeper3/elements/chunks/en/). tip - right click gives you access to update.
Note: if you intend to access the image TV to display an image of the product in the cart, as I do here, you must add image to savePurchasesFields.

Note2: if you wish to display any label other than pagetitle with your product, you need to create a new property fieldName with a value indicating the field that you wish to be displayed, in my example longtitle.
![]()
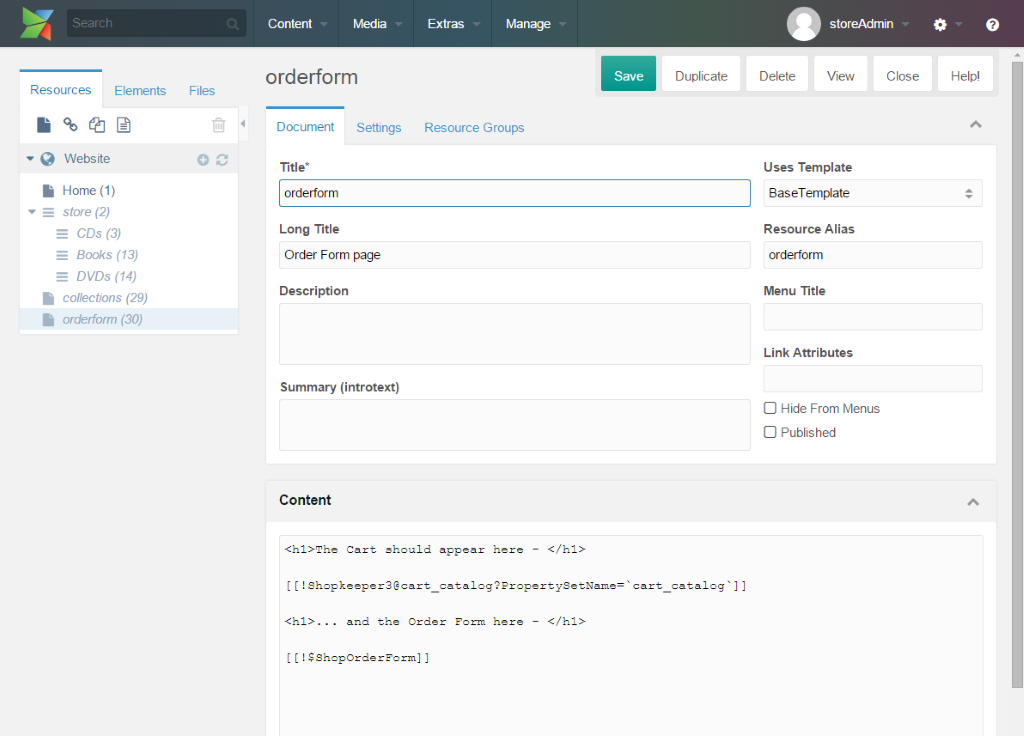
Now create your Order Form Resource, it should look initially something like this :
View this page, you should see this :

If it all displays correctly, pat yourself on the back, have a large, stiff drink, and be happy, the worst is over, you have successfully installed and configured Shopkeeper !
